

How to Ventilate an Enclosed Butler’s Pantry When Appliances Are Running
Managing the airflow when ventilating an enclosed butler’s pantry when appliances are running is essential to prevent heat buildup and moisture damage. Without proper circulation, small spaces containing coffee makers, wine fridges, or ice machines quickly become stifling and can compromise your cabinetry or food supplies.
By installing targeted exhaust systems or passive vents, you can ensure your prep area remains functional and fresh. This article explains the most effective strategies for maintaining a stable environment in your home‘s secondary service space.
Immediate Solutions for Heat Extraction
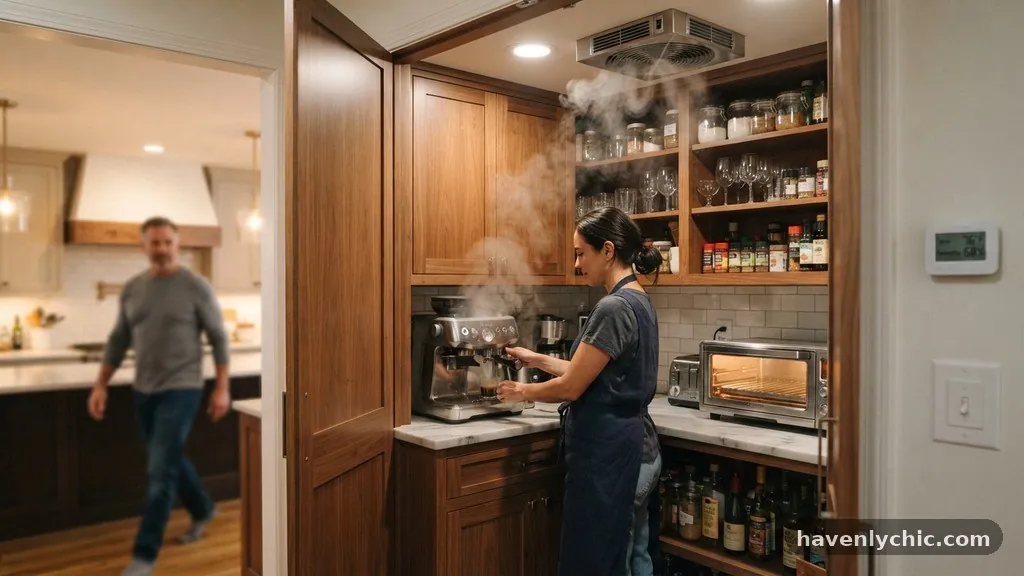
If your pantry feels like a sauna when you turn on a countertop oven or a high-powered blender, you need an immediate way to move that hot air out. The most direct method is the installation of a small, wall-mounted exhaust fan that vents directly to the exterior of the house.
These units are similar to bathroom exhaust fans but are sized for smaller square footage. You should look for models that offer a low-sone rating to keep noise levels down while you work in the main kitchen.
Another effective approach involves using a transom vent or a louvered door design. If the pantry is completely sealed, heat from appliances has nowhere to go but into the surrounding wood cabinets.
A louvered door allows for natural convection, letting cool air enter at the bottom while warm air escapes through the top. This simple change can significantly reduce the temperature spikes that occur during heavy appliance use.
Understanding the Role of Passive Ventilation

Passive ventilation relies on the principle that hot air rises and seeks an exit. By installing a decorative grille at the highest point of the pantry wall or ceiling, you create a chimney effect.
This is particularly useful in an enclosed butler pantry where installing motorized mechanical systems might be too expensive or logistically difficult. For the best results, pair this high-level vent with a low-level intake vent located on the opposite wall.
Placement is critical when you are trying to move air through a confined space. If you place both vents on the same wall, the air will simply short-circuit and fail to cool the actual appliance area.
You want to encourage a cross-breeze that pulls fresh air across the counter surfaces where the heat is generated. This strategic positioning keeps your equipment from overheating and protects the finish on your custom cabinets.
Mechanical Ventilation Options
When passive airflow isn’t enough, you must turn to mechanical systems to ensure your space remains safe. A booster fan installed in a duct run can pull air from the pantry and push it into a larger, well-ventilated area or directly outside.
These systems are often automated, meaning they can be linked to a thermostat or a humidity sensor. When the temperature or moisture level crosses a specific threshold, the fan kicks on automatically.
It is helpful to consider the cubic feet per minute (CFM) rating of any fan you plan to install. For a standard butler pantry, a unit providing between 50 and 100 CFM is usually sufficient to refresh the air several times an hour.
Always check the manufacturer guidelines provided by the American Society of Heating, Refrigerating and Air-Conditioning Engineers for recommended ventilation rates for non-habitable service rooms. Over-sizing a fan can create negative pressure, which might pull odors from other parts of the home into your pantry.
Protecting Cabinetry from Moisture and Heat

Your cabinets are often the most vulnerable element in a poorly ventilated pantry. Wood is a natural material that reacts to temperature fluctuations by expanding and contracting, which can lead to warped doors or cracked finishes.
When appliances like dishwashers or steam ovens run, they release significant amounts of humidity. This moisture can become trapped behind closed doors, leading to mold growth or structural damage over time.
To mitigate this, ensure there is at least an inch of clearance between your appliances and the back or side walls of the cabinets. Installing heat-reflective shielding on the interior walls of the cabinet housing can also help.
These thin panels redirect radiant heat away from the wood and toward the open space of the pantry. It is also wise to keep the interior of your cabinets organized so that air can circulate freely around your storage items.
Strategic Appliance Placement

Where you place your appliances determines how much stress they put on the room‘s environment. Ideally, you should group heat-producing items like espresso machines or slow cookers near the existing ventilation source.
If you have a sink in your butler pantry, avoid placing electrical appliances directly adjacent to the splash zone. Moisture from the sink combined with heat from the appliance creates a high-humidity environment that is difficult to manage.
Consider the following table when deciding on the placement and ventilation needs of your butler pantry appliances:
| Appliance Type | Heat Output | Ventilation Priority |
|---|---|---|
| Wine Fridge | Low to Medium | High (requires rear clearance) |
| Coffee Machine | Medium | Medium (requires top clearance) |
| Countertop Oven | High | Very High (needs direct exhaust) |
| Ice Maker | Low | Low (needs front-venting kickplate) |
Managing Airflow During Heavy Use
If you are hosting a party and using multiple appliances simultaneously, you need a plan for managing that load. Start by leaving the pantry door open if possible, as this is the most effective way to equalize pressure and temperature.
If the door must remain closed for aesthetic reasons, consider an automated door-opener or a smart sensor that alerts you if the temperature hits a specific level. You might also consider using a portable dehumidifier if you notice the air feeling heavy or stagnant after a long period of entertaining.
Regular maintenance of your ventilation system is just as important as the initial installation. Over time, dust and grease can build up in exhaust fan blades or vent grilles, severely restricting airflow.
Clean your intake and exhaust points at least twice a year to keep the system working at peak efficiency. If you use a filter in your exhaust setup, replace it according to the manufacturer’s schedule to ensure the system doesn’t become a bottleneck for stagnant air.
Designing for Future Ventilation

When planning a renovation or a new build, you have the best opportunity to integrate ventilation from the start. Build the ductwork into the wall cavities before the drywall goes up, saving yourself a major headache later.
You can hide the exterior vent caps behind architectural features or shrubbery so they don’t disrupt the look of your home’s exterior. This proactive approach ensures you never have to worry about the limitations of a small, enclosed room.
* Incorporate louvered panels into the baseboards for hidden air intake.
* Use ceiling-mounted register vents to pull hot air out of the room.
* Install smart outlets that turn on the exhaust fan automatically when an appliance is powered.
* Select appliances that have front-venting exhaust systems to reduce rear heat buildup.
* Use heat-resistant materials for backsplashes to protect surrounding surfaces.
Addressing Noise and Aesthetics

A common concern with adding ventilation is the noise factor, which can be disruptive if the pantry is near a living or dining room. Look for ultra-quiet fans that operate at less than 1.0 sone.
You can also install a remote-mounted fan, where the motor is located further down the duct run, significantly reducing the sound perceived in the pantry itself. This is a common technique used in high-end kitchen design to keep the space quiet while still providing powerful air movement.
Aesthetics matter just as much as function. Many modern vent covers are designed to look like decorative wall art or can be painted to match your wall color exactly.
If you are using a louvered door, choose a style that complements the cabinetry and hardware of your main kitchen. The goal is to make the ventilation system feel like a deliberate part of the design rather than an afterthought or a utility-focused eyesore.
Common Ventilation Pitfalls
Many homeowners make the mistake of assuming a small window is enough to ventilate a butler pantry. While a window provides natural light, it rarely provides adequate cross-ventilation unless it is perfectly positioned in relation to a door or another opening.
Furthermore, relying on an open window can allow pests or debris into your food storage area. It is almost always better to rely on a controlled, filtered mechanical system.
Another error is ignoring the intake side of the equation. You can have the most powerful exhaust fan in the world, but it won’t move air effectively if there is no path for fresh air to enter.
If your pantry is built with tight-fitting, weather-stripped doors, the fan will simply create a vacuum and burn out its motor. Always ensure there is a dedicated air intake, such as a gap under the door or a wall-mounted louver, to allow for a steady flow.
FAQ
Does a butler’s pantry need a dedicated HVAC vent?
While not strictly required by most building codes, adding a dedicated HVAC supply vent is a great way to keep the temperature consistent. It prevents the room from becoming a dead zone in your home’s thermal envelope.
Can I just use a portable fan in the pantry?
A portable fan can help in a pinch, but it doesn’t solve the issue of where the hot air goes. It just circulates the heat within the room, which can actually make the appliances work harder as they pull in warmer air.
What if I don’t have space for ducts?
If you cannot run ducts, consider a ductless ventilation system or a high-quality air purifier that is rated for odor and humidity control. While it won’t remove heat as effectively as a direct exhaust, it can certainly help with moisture and air quality.
Is it dangerous to have appliances in a sealed room?
Most small appliances are safe, but heat buildup can lead to fire risks if the surrounding materials are flammable or if the appliance overheats due to poor circulation. Always check the clearance requirements in the appliance manual and ensure the room has at least basic passive ventilation.
How do I know if my ventilation is working?
You can perform a simple smoke test by holding a lit incense stick near the intake point while the fan is running. If the smoke is pulled steadily toward the exhaust and doesn’t linger, your airflow pattern is effective.
Conclusion
Successfully ventilating an enclosed butler’s pantry when appliances are running is a matter of balancing mechanical extraction with proper passive intake. By focusing on the flow of air from the lowest point to the highest, you can prevent heat and moisture from damaging your cabinets or impacting your food. Whether you opt for a simple louvered door or a complex, automated exhaust system, the key is to ensure that heat has a clear path to escape.
Take the time to assess your current setup and identify where the heat is accumulating during your heaviest usage times. Small adjustments, such as adding a wall vent or increasing the clearance around your appliances, can yield significant improvements in the longevity and comfort of your space. With these strategies in place, you can keep your butler pantry as functional and efficient as the main kitchen itself.